Welcome to another blog article about our in-house process automation platform DPM. In the article “Data Handling in Camunda: How to Start with DPM Json” we introduced our popular data handling tool DPM Json. Now we’ll take a look at how to create complex forms and interaction options directly from a Camunda process.
Creating forms is daily business for a Process Consultant, and Camunda offers very good tools for this task. However, we decided to take personalization and flexibility in form creation to a higher level, especially to be able to easily display complex data types like lists or objects and interact with them in different ways.
Design: Customize DPM
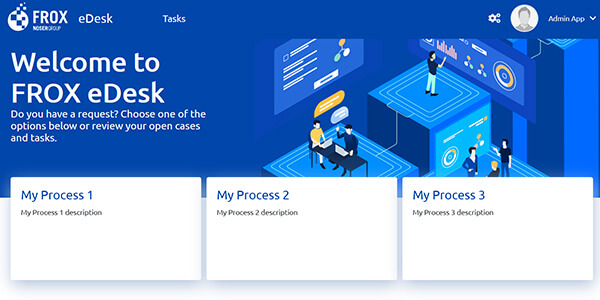
Thanks to the open software architecture of our DPM platform, it is very easy to redesign it visually. The basic design of our web application is in FROX theme with blue, black and white tones. In addition, our logo is placed on the top left. This view is completely customizable to a client’s branding and theme. All other views, forms, etc. are displayed accordingly.
Form fields in DPM
With the DPM platform it is possible to generate form fields directly from the process definition. Forms can be created in user tasks and in the process start within a form. To create a form field, a new field must be opened in the task in the “Forms” tab using the plus button. With the following illustrated setting a text field is created:
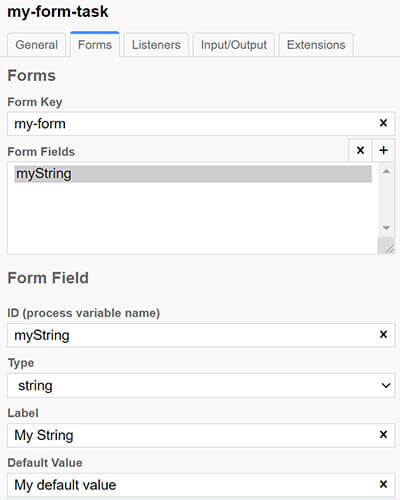
After this setting, the newly created form will look like this on the DPM platform form:
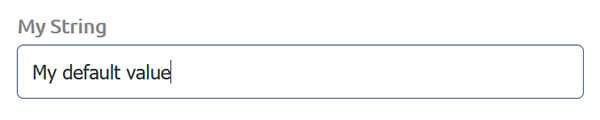
The label of the field is “My String” and contains “My default value” as default value. The type of the field is “string”, which is a synonym for “text” in computer science.
Up to this point, the DPM platform does not differ in terms of configuration from the form fields already provided by Camunda. All field types already available are supported:
- String (text field)
- Long (number field)
- Boolean (checkbox)
- Date (date field)
- Enum (field with specified choices)
This means that you can migrate your existing Camunda processes to our platform without any problems and have the forms generated as before. However, this is just the beginning for the DPM platform. Below we show you a selection of the fields we provide.
Multiselect combobox
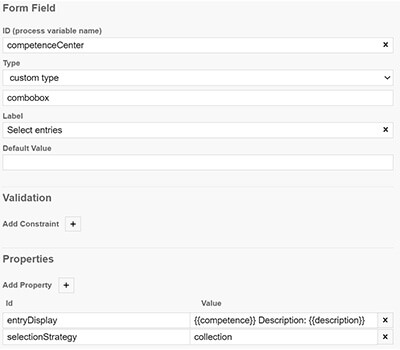
With the form field type “custom type” and the specification “combobox” a combobox (also called “dropdown” or “select”) is automatically created on the form. A simple combobox is already offered in Camunda with the field type “Enum”. However, it can be very common that a user needs to select multiple fixed values, such as when setting an employee’s areas of expertise. Here there are fixed values from which a user can select several.
On the form UI, you can now enter several possible centers of excellence.
Slider
With the form field type “custom type” and the specification “slider” a slider is automatically created on the form. This is especially useful when the user needs to enter a rough numerical specification, for example: “How satisfied are you with the service?”

Lists
With the form field type “custom type” and the specification “table” a table is automatically displayed on the form, which can contain a list of values.
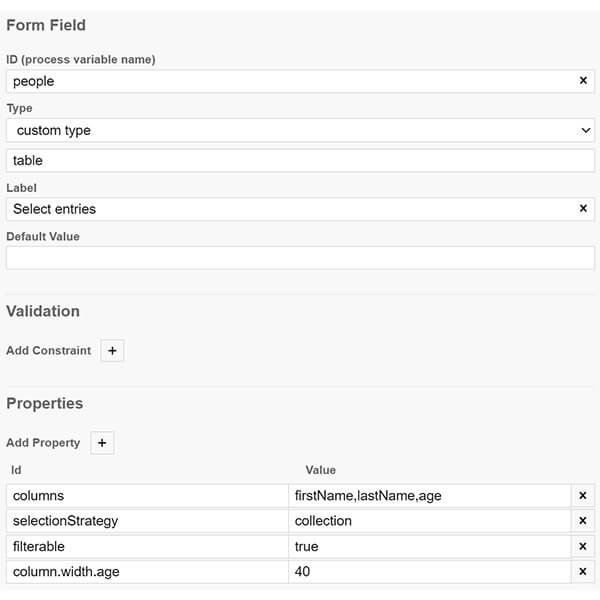
In this configuration we see several details:
The process variable that is displayed is called “people” and as expected it is a list.
The first property “columns” specifies that from the list “people” the attributes “firstName”, “lastName” and “age” are displayed for each list element.
The second property “selectionStrategy” indicates how the elements can be selected. In this case it is “collection”, which means that each list item has a checkbox that can be selected. The selected items are then written to the “people” list. This means that you can use this method to manually select or deselect each list.
The third property “filterable” means that you can filter the list so that each column can be searched with a search term.
The fourth property “column.width.age” sets the width of the column “age” to the value 40. This property can be set for all displayed columns.
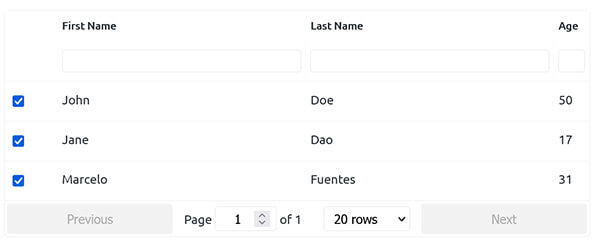
On the UI this looks like this:
File Upload
In some User Tasks it may be necessary to upload one or more files, for example to save contracts etc. in the process. This is no problem with the DPM platform. It is sufficient to create a form field with the field type “file”:
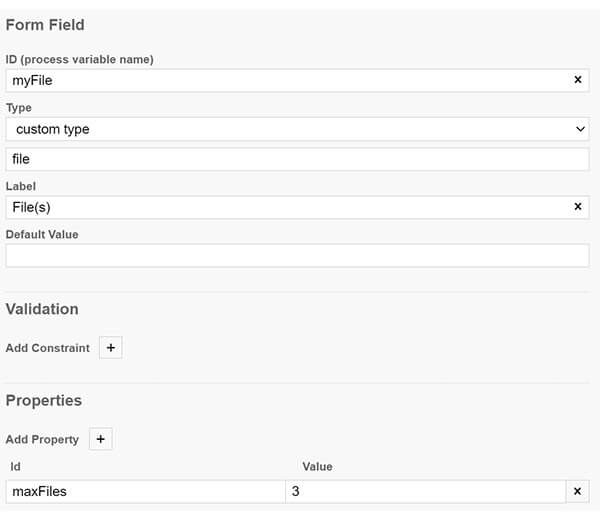
In this case, the property “maxFiles” was also set to the value 3, which means that no more than three files can be uploaded.
Field settings in DPM
Each field is configurable under different aspects, among others:
- Whether the field is required, for this the field is assigned the property “required”.
- Whether the field should be modifiable, for this the field is assigned the property “readonly”.
- Whether the field should be visible, for this the field is assigned the property “visible”.
These three properties can be either “true” (true) or “false” (false).
They can also be set with an expression, for example:
${myCondition == "isMarried"}
In this condition the value “true” is returned if the variable “MyCondition” contains the value “isMarried”.
Pleasant additional feature: The expressions are recalculated for each user interaction. This means that you can, for example, show or hide an entire form section by changing a checkbox in real time (by calculating the value of the variable “visible”).
Furthermore, it is possible to assign each form element to a fieldset. This is very useful to divide forms into sections, e.g. to separate input fields for personal data from those for work topics.
Live Reload for Lists in DPM
With DPM it is possible to reload the data for a table on every page load (process independent). This is especially useful when working with real-time data that is continuously updated. For this purpose, you can call an integration from the Form UI that pulls the data.
Approval Tasks in DPM
It is often necessary to approve or reject a form. This is possible with the DPM platform using the “approval” property. The approval buttons “Accept” and “Reject” are automatically added to the form when this property is set. In addition, you can personalize the text on the buttons by setting the “approveButtonLabel” and “rejectButtonLabel” properties. The default buttons look like this:

Summary: Custom settings in DPM
As you can see, the DPM platform gives you extensive options to design your application and forms exactly the way you want. These settings can be completely defined from the process model and are 100% compatible with Camunda’s standard form features. We will be happy to answer your questions and advise you so that you can make the best use of our platform.